Showing posts with label C-Celebrations. Show all posts

Cricut Birthday Bash - Third and Final Layout


Wow, was yesterday a fun day, or what?  Are all of you as tired as I am?  I am going to confess to taking a late afternoon half hour nap to get through the evening! 

I was super exited to have won an Expression II first thing yesterday morning!  I could not believe that I went to bed after 2:00 am and got up at 6:00 am to watch more HSN and interact with Provo Craft on FB.  Imagine my shock when they posted the 6:20 am winner and it was me?  I was on the phone with MFK (my friend Kathy), who I had just awakened.  She had been up until 3:00 am watching HSN!  I felt horrid for waking her - she is almost always up very early - but she says it was okay since she was talking to me when I won.  What a good sport and GREAT friend!!


Today's layout is the third of the three I entered into the Birthday Contest.  This design took a design from my data disc DVD set and incorporated a few changes to come up with the Cricut Birthday layout.  (So is anyone like me and wondering WHAT PC plans to do with almost 500 birthday layouts?).   I used Imaginesce Birthday Bash cardstock along with Bazzill and glitter cardstock to create this layout. 


The decorative background piece was created in Design Studio using a cut from Cindy Loo, welded together multiple times to form a square.  I used medium weight glitter cardstock and multi-cut the page two times.


Similar to my Cricut birthday layout, I had fun with a birthday hat.  I thought the number 5 needed a birthday hat topper.


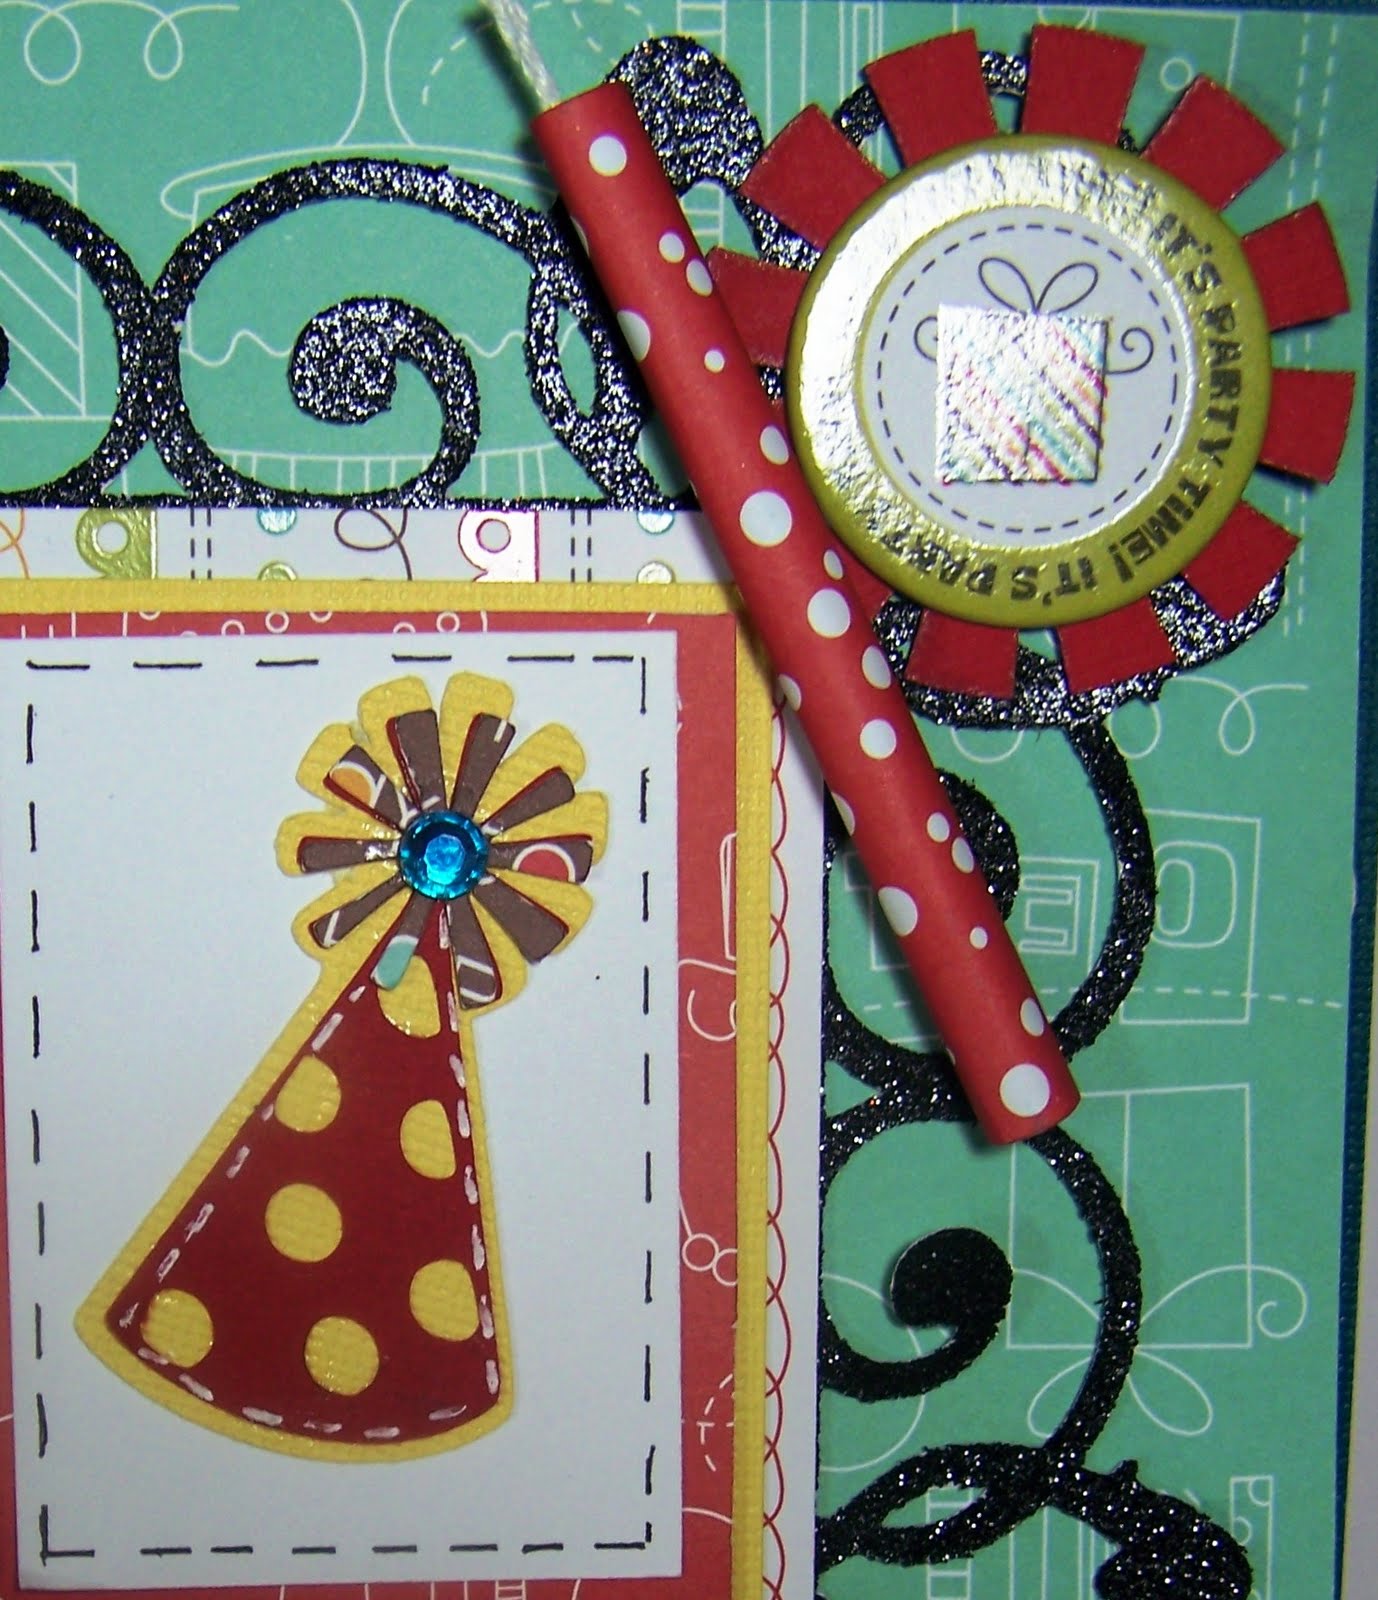
I finished the layout with a few gemstones, doodles, ribbons, and Imaginesce birthday candles and chipboard circle.  I cut a flower and mounted the circle on top.  I used a thick line of zip-dry glue to hold the candles on the corners. 


Thanks for stopping by today and thank you for all of the kind wishes from yesterday!!  I will be back tomorrow with a new - NON-birthday project! 

I read yesterday now that the Expression II release is over we all have to move on to the Royal Wedding (both being historic events and all!!).  Well, more on this later in the week but.... MFK is having the girls over on Friday morning (arriving at her home between 4-6 am) for a royal wedding bash!  I'll keep you posted......

Happy 5th Birthday Cricut Day 2


Happy Birthday, Cricut!  It's day two of the Cricut's birthday celebration and I have another birthday layout to share.  This was the second of the three layouts that I submitted to the Cricut Birthday Celebration.  I love the large background doily from the Basic Cake cartridge, especially in Cricut Green!

**** UP DATE **** This layout won!!! At 6:37 am this morning Cricut announced that this layout won for best Cricut theme!!!!  Woo-hoo!!  I am so excited that I am having trouble typing!!!


Using my lastest Cricut Circle cartridge, Cricut Everyday, I cut the large logo cricut circle, then used scissor to cut away part of the top circle to create the letter "C" in the work Cricut.  I used bright colors - Cricut green, pink (for the Pink Cricuts) and blue because I have a blue expression. 


I have always loved this party horn cut from Celebrations.  I cut the top layer twice and used scissors to cut away the mouth piece on the pink cut and to keep only the mouth piece on the blue cut.  The shadow cut is in dark blue.


I put a fun party hat on the "C" cricut head - It is Cricut's birthday after all.  I added a flower behind the top of the hat and I added a gem to the middle of the hat top.


I have one other thing to share today.  I ordered a glass tile backsplash tile kit from DIY Network last week and it arrived this afternoon.  The box claimed that the entire project could be done in two hours, which I did not believe, but I decided to install my tile last night anyway.  Over all, including cleaning up, the tile took me about three hours to cover 15 square feet.  I hope you don't mind, but I am going to share photos of my first tile project.


I went with Almond colored tile, which has a touch of metallic copper and gold as well some tans and light browns.  I thought that the almond would work with our white cabinets and multi colored earth tone counter tops. 


The almond tile also blends well with the 4x4 ceramic tile over the sink and cook top.  I just need to do a few finishing touches, but the work is really finished. 

I will be back tomorrow to share my final Cricut birthday layout.


Chocolate Cupcake, Blog Hop, and Fabulous Blog Hop Candy


Wow, what a great Monday morning! 


First - it is the monthly BBTB2 Design Team Blog Hop!  That means you probably arrived here from BBTB2.  The featured cut this week is one of the cupcakes from the Celebrations cartridge.  I cut my cupcake in chocolate brown paper with pink frosting and gem flower sprinkles.  I then added a birthday hat, a scalloped card front and a Happy Birthday tag made with Stampin' Up stamps and Spellbinders oval nesties to create this girly birthday card.  I topped the birthday hat off with a lovely prima flower and a larger gem flower and trimmed both the hat and the cupcake wrapper with Making Memories ribbon


In addition to the blog hop, we have a lot going on at BBTB2.  BBTB2 has a blog hop give away which is being sponsored by Everyday Cricut (formerly known as Holiday with the Cricut).  You can win the Sweethearts cartridge and package of SEI (Happy Day) scrap paper.  All you have to do to be eligible to win is leave a comment on BBTB2 blog AND sign up to follow the BBTB2 blog.  How easy is that?


I too have a fabulous blog hop give away/blog candy.  Custom Crops is sponsoring me this week with a $25.00 gift voucher for their store.  Just leave a comment below and I will select a winner for the gift voucher on Thursday, March 4th.  Thank you so much Custom Crops for sponsoring my prize this month!


After you leave your comment below you (because YOU KNOW you want the $25.00 gift voucher) you will continue on the BBTB2 design team blog hop.  Your next stop is at Lori's blog.  Lori is a very talented designer and I know you are going to love what she has made to share.  Happy Hopping!!

It's a Gypsy New Year Project


The Gypsy Spot is back from the holiday break!! The challenge this week at the Gypsy Spot was to create a round card and include welded numbers 2010. I tweaked the requirements a bit and created an oval card where the zero (0) is the card shape.


I used Gypsy Font for my basic card. I welded 2010 at two inches, but increased the size of the first zero to four inches, making the cut in black cardstock. I then used the blackout shadow of the zero to create the welded card base, cut in white cardstock. Next I welded the blackout shadow of 2010 and cut it in gold metallic paper.

I found the word Happy on the Christmas solutions cartridge and added the word to the front of the card, in black and gold. And finally, I took the party horn from the Celebrations cartridge and again using metallic papers, I used pop dots and attached the horn to the front of the card.

I hope that you all had a happy new year... and that 2010 is a wonderful year for each of us.

Celebrations Scalloped Tag and A Bear Die


This week's challenge cut at Bitten by the Bug is the scalloped tag from the Celebrations cartridge along with a bear die that we received from this week's sponsor, Go Kreate. The bear die included several accessories as well as two body cuts. I chose the sweet baby bear "shy" body, the diaper, paci, and rattles.


I tried cutting the bear in black, thinking a baby black bear would be adorable, but he was too dark. So then I abandoned reality and went with a soft pink bear with blue accents.


I used Stampin' Up paper to cut the tag shadow and card front. I thought the 1 inch ribbon and bow were a nice touch too. And of course I added doodle dots to enhance my sweet little bear.

Jumping the Gun... St. Valentine's Day Sneak-Peak

I finally took down all of the Christmas decorations (except for the 6 red ornaments sitting in a tray on my coffee table - I cannot find where I hid their box from myself!). I always feel like we have lost all color when everything gets put away. So today, between other projects, I made a St. Valentine, Be Mine 3D centerpiece for my entry way table.


I used Doodlecharms for the assorted heart pieces, Celebration for the cupcakes, George for the circle cuts on the edges of the hearts, and Storybook for the words. I also used Tami's (Sunnieday) new year's gift to the cricut mb as embellishments. For some reason Valentine's always makes me think of cupcakes. Odd, I know.


The vintage photo came from Clearly Vintage (http://clearlyvintage.blogspot.com/), where there are many amazing images. I liked this cute little female Cupid (women's rights, and such).


Well, I may have jumped the gun, but the retailer all beat me to the punch!!!