Showing posts with label desserts for dudes. Show all posts

It was an . . .

...itsy bitsy, teenie weenie, yellow polka dot bikini!

I thought we'd finish off Desserts for Dudes month by giving the guys a little eye candy cookie.

As Mr. E probably has guessed, this is as close to a bikini as I'm getting in this lifetime (or the next).  Enjoy, honey.

The bikini cookies are really simple  I outlined and filled in yellow royal icing; I used a combination of AmeriColor Lemon Yellow & Egg Yellow for this color.  The dots were dropped on while the yellow icing was still wet.  (A video of this technique is available here.)

To make the palm trees:

  • Using #2 tips, outline the branches in green and the trunk in brown royal icing (AmeriColor Avocado and Leaf Green mixed, AmeriColor Chocolate Brown). 
  • Thin the royal icing with water to the consistency of thick syrup.  Cover with a damp dish towel and let sit several minutes.
  • Stir gently with a rubber spatula to break any air bubbles that have risen to the surface.  Transfer to squeeze bottles.
  • Fill in the trunk of the tree in brown.
  • Fill in the leaves in green.
  • After 1 hour or so, add the details to the truck in piping consistency royal icing, using a #2 tip.
  • Let dry overnight.
  • Prepare a "sanding sugar station."  You'll need:
  1. meringue powder mixed with an equal amount water
  2. sanding sugar
  3. small paint brush
  4. coffee filter
  • Paint the meringue powder/water mixture over the edge of the cookie.
  • Holding the cookie over the coffee filter, sprinkle on the sanding sugar. Shake off excess onto the filter.  
  • Use the filter as a funnel to refill container of sanding sugar.


    So, what did you guys think of Desserts for Dudes month?  I'll tell you our favorites:
    Alrighty...Desserts for Dudes month is officially over.  Bring on the pink and sprinkles!

    Kiddo in the Kitchen : Zucchini Spice Cupcakes

    Desserts for Dudes
    I don't know about you, but when kiddo and I go to the farmer's market, our minds turn to big, farm-fresh salads cupcakes.  I'm pretty sure he chose this recipe so that zucchini I bought wouldn't show up on his dinner plate.

    {Don't worry...I'll torture him with the tomatoes.}

    The cupcake and frosting recipes come from Martha Stewart's Cupcakes. We halved the recipe (I really don't need 24 cupcakes sitting around the house). 

    Zucchini Spice Cupcakes
    {modified from Martha Stewart's Cupcakes}

    1 and 1/2 c. all-purpose flour
    1/2 tsp. baking soda
    1/4 tsp. baking powder
    1/2 tsp. coarse salt
    2 tsp. cinnamon
    1/4 tsp. freshly grated nutmeg
    1/8 tsp. ground cloves
    1/2 c. vegetable oil
    1 egg, room temp.
    1 and 1/2 tsp. vanilla
    1/2 tsp. grated lemon zest
    1 c. light brown sugar, packed
    1 and 1/2 c. grated zucchini
    1/2 c. walnuts, toasted and chopped

    Preheat oven to 350.
    Line a muffin tin with 12 paper liners.

    Whisk together the flour through cloves.  In another bowl, whisk together the oil, egg, vanilla and zest.  Whisk in the brown sugar until smooth.

    Stir in the zucchini.  Add the flour mixture just until combined; stir in the walnuts.

    Divide the batter evenly between the cups.  Bake, rotating halfway through, about 20-24 minutes.  Cupcakes will spring back when lightly toughed in the center and a toothpick should come out clean.

    Cool in the pan for 10 minutes.  Remove cupcake to a cooling rack and let cool completely.


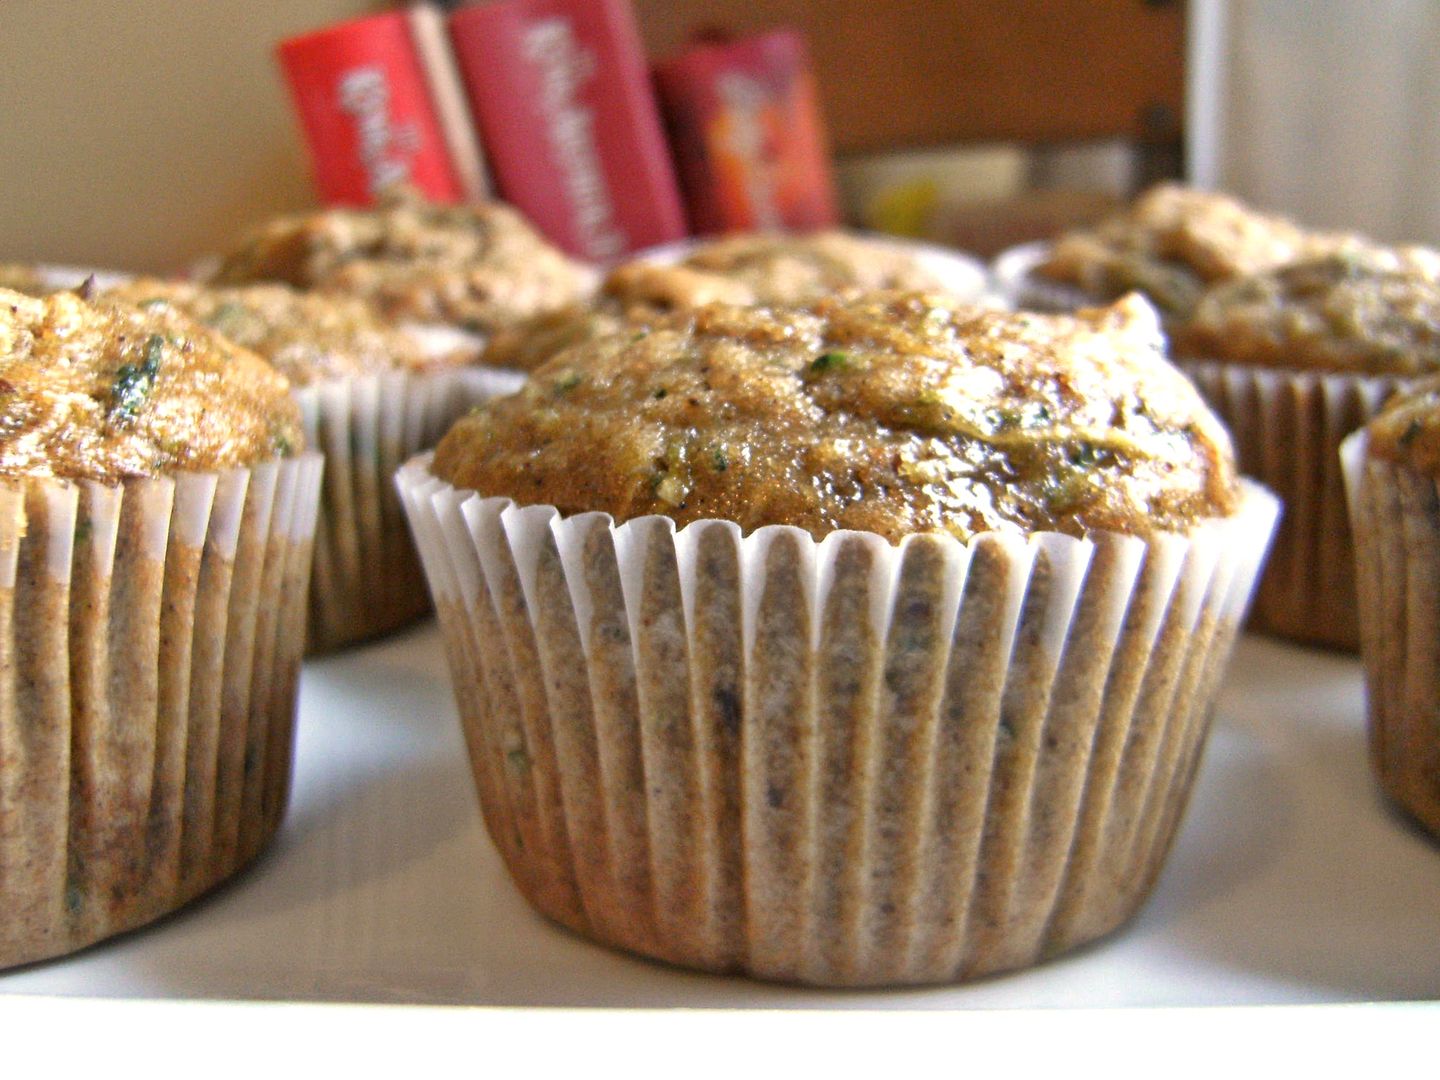
    {Aren't they pretty? I'm thinking we could stop here and call them muffins. But, we won't.}


    Cream Cheese Frosting
    1 stick unsalted butter, room temp.
    6 oz. cream cheese, room temp.
    2 c. powdered sugar
    1/2 tsp. vanilla

    Beat the butter and cream cheese on medium-high until fluffy, about 3 minutes.  Reduce speed to low, and1/2 c. sugar and vanilla.  Mix until smooth and combined.  Add the remaining sugar 1/2 cup at a time, beating after each addition until smooth.

    Now it's time to frost the cupcakes...
    Kiddo said he wanted to try piping instead of spreading the icing.
     
    He did a really great job...and I couldn't get enough of watching him. 


    These cupcakes are wonderful...moist and full of flavor.  And, you can never go wrong with cream cheese frosting!  We think you'll like them!

     The verdict?


    Here...we saved one for you....


    {OH! I almost forgot....there are a couple new videos over at University of Cookie.  Be sure to check how the method TidyMom uses to roll her cookie dough.  Genius!}

    One of Mr. E's Favorites : Mocha Toffee-Crunch Terrine

    Desserts for Dudes

    {We just call this "layered ice cream dessert", because we're fancy like that.}

    Mr. E can't decide on his very favorite dessert, but this is one of them.  Frozen and creamy...it's like a combination of cheesecake and ice cream. 

    You know what I love about it?  It HAS TO be made ahead of time.  In my book, that makes it perfect for holidays and company! 

    Mocha Toffee-Crunch Terrine {or Layered Ice Cream Dessert}
    (modified from Everyday Food , issue #2)

    19 chocolate wafer cookies
    2 tsp. instant espresso powder
    11 ounces cream cheese
    1/2 c. sugar
    1 TBSP vanilla bean paste (or vanilla extract)
    1 & 1/4 c. heavy cream
    1/2 c. toffee bits
    1/3 c. chocolate chips, melted and cooled
    1 TBSP dutch-process (or natural) cocoa powder

    Line a 9x5" loaf pan with 2 sheets of plastic wrap, long sides overhanging by about 3". Arrange 3 wafers, flat side up in the bottom of the pan.

    Dissolve the instant espresso powder in 1 tsp. water and set aside.

    Beat the cream cheese with the sugar several minutes until light and fluffy.  Beat in the vanilla bean paste.  Set aside.

    In another bowl, beat the cream until soft peaks form.  Fold the whipped cream into the cream cheese mixture in 3 additions until fully combined.

    In one bowl, mix 1 and 1/3 cup of the vanilla cream mixture with the toffee bits.  In another bowl, add the cooled chocolate and cocoa with another 1 & 1/3 cup of vanilla cream.  Finally, add the coffee mixture into the remaining cream.

    With a rubber spatula, spread the coffee mixture into the bottom of the pan.  Cover with 8 wafers, overlapping if necessary.  Add the chocolate mixture and spread evenly; cover with 8 more wafers.  Add the toffee mixture and spread.

    Press the plastic wrap onto the top and freeze at least 4 hours.  Invert onto a serving platter; remove plastic.  Let sit 5 minutes and cut into slices.


    Are you guys feeling lucky?  The dancing queens, Molly & Amanda, from idance ordered cookies, but not for themselves, for YOU!!! They are giving away a half dozen cookies baked by little ol' me!


    {Have you been to idance?  It's so fun!  Be sure to read their "revolution" page...I think it's something a lot of us can relate to!}

    So, GO!  Go enter!  What are you waiting for?!?

    Deep *DARTH* Chocolate Cookies

    Desserts for Dudes
    {Darth Vader Cookies}

    Insert Imperial March here:
    dum, dum, dum,
    da, da, dum,
    da, da, dum

    Have you seen these cookie cutters from Williams-Sonoma?
     
    These cutters make embossed cookies...they practically decorate themselves!

    Kiddo had a friend coming over for the day, so I whipped up a few Darth Vader cookies.  I used this recipe (oh, and it is SO SO GOOD!), omitting the espresso powder because:
         a. I was out, and
         b. do 11-year-old boys really need espresso powder?

    Now, these cookies are made with Dutch-process cocoa powder which makes them really dark, but I also added in some AmeriColor Super Black food coloring.  When tinting dough, just knead in the food coloring with your hands.  If the dough gets warm when you do this, pop it in the fridge for 30 minutes or so before rolling.

    I rolled these out on a surface dusted with a combination of flour and cocoa powder.  Don't worry, if you see some on your cookies...it will bake right in.

    One more tip....once cut, pop these in the freezer for 5-10 minutes before baking to prevent spreading.


    Here's what they looked like just out of the oven....
    ...perfectly cute!  You really don't need to do anything else to them.

    But, of course, I couldn't leave well enough alone.  I tried Amanda's (from i am baker) cookie decorating icing.  I need some more practice with it....mine was a little bumpy and Amanda's never is, but I really liked it.
     
    It was shiny, and easy to adjust, and perfect for those times when you don't want to make a big batch of royal icing.
    {There is a wonderful video of Amanda making her icing, here, on University of Cookie.}

    Now that your cookies are made, it's time to break out your kid's Star Wars Legos and have some fun.  Yes, we're dorks.
     
    {I was just informed that the Tie Fighter is backwards. Oops.}
    {PS....if you want to see some great ideas for these cutters, visit Jenn and Bento for Kidlet! She is one cool mom!}

    Who is your favorite Star Wars character?  
    Me, I can't decide. I'm torn between C3PO, Yoda and Princess Leia's hair.

    For the Little Dudes . . .

    Desserts for Dudes month continues with Cute as a Button cookies
    ...because dudes have to start somewhere!

    When our little dude was born, he decided to make an entrance.  An unexpected entrance via emergency c-section, 10 weeks early.  He weighed 2 pounds, 13 ounces. 

    {Kiddo is now 11 years old and 5 feet tall....wearing the same size shoe as his mother...}

    Looking at birth announcements, I found one that said "cute as a button" and it was perfect because he was about the size of a button.  I only wish I knew how to make cookies back then. :)

    The buttons are made from homemade fondant.  Remember that?  They were so fun to make; I could have made hundreds of them.

    Supplies for the buttons:
    • tips: Wilton 4B, and #1 or #2 plain tips
    • cornstarch
    • rolling pin
    • toothpicks
    • chopstick
    To make the buttons, color the fondant with gel paste food coloring, kneading until fully blended.

    Dust the surface and rolling pin with cornstarch to prevent sticking, a tip Buddy gave us, and roll the fondant thin, maybe 1/8 to 1/4 of an inch. Use a bench scraper to lift the fondant off the counter if necessary.

    Using the back of the Wilton 4B tip as a cutter, cut out the button shape.

    Mine kept getting stuck, so I used  a chopstick to nudge them out.
    {PS...I'm not going to quit blogging to be a hand model anytime soon.}

    With the back of the #1 or #2 tip, add the inner circle button detail, being sure not to press all the way through.

    With the tip end of the #1 or #2 tip, make button holes.
    {Seriously, what are those holes called? A button hole is something you push your button through.  There must be a name of the holes in the middle of a button. Anyone? Anyone?}

    Use a toothpick to poke all the way through the button.
    {Again...no hand modeling.}

    Let dry at room temperature.  Store in an air-tight container at room temperature.


    For the cookies:

    • Outline & flood the cookies with royal icing and let dry overnight.
    • Pipe the dots around the border.
    • With an AmeriColor Gourmet Writer Food Decorator Pen , add the wording. (AmeriColor pens are much better than the ones as the grocery store!)
    • Attach the buttons with a bit of royal icing.
    • Let dry several hours.